You don’t need another list of apps.
You need a reason to open the ones you already have! And each of those needs a clear job in the juggling act that you do everyday!
That distinction matters because technology can either simplify a science classroom routine or make it feel like one more system to manage. If every lesson requires a different platform, a different login, and a different set of directions, the technology becomes the work. But when a small set of technology tools supports the same stages of learning again and again, students can focus on the science.
My own routine grew out of necessity. I have taught chemistry online for sixteen years, and working in that model meant that I couldn’t depend on a stocked laboratory or a live demonstration to make an abstract idea visible. I had to create learning experiences students could access, manipulate, record, and revisit through a screen.
I would take that same routine into a face-to-face classroom tomorrow — not because students need more screen time, but because the right technology can make active learning in science possible more consistently.
The system is simple:
- Before instruction, use a free digital resource students can view or control to investigate.
- During instruction, use Seesaw to capture what students notice, try, build, and conclude.
- Beyond the live lesson, use BookWidgets to preserve the full learning experience for absences, extra time, self-paced work, or asynchronous instruction.
Those tools don’t replace hands-on labs, teacher mentoring, or student conversation and collaboration. They give each one more room to do its job.
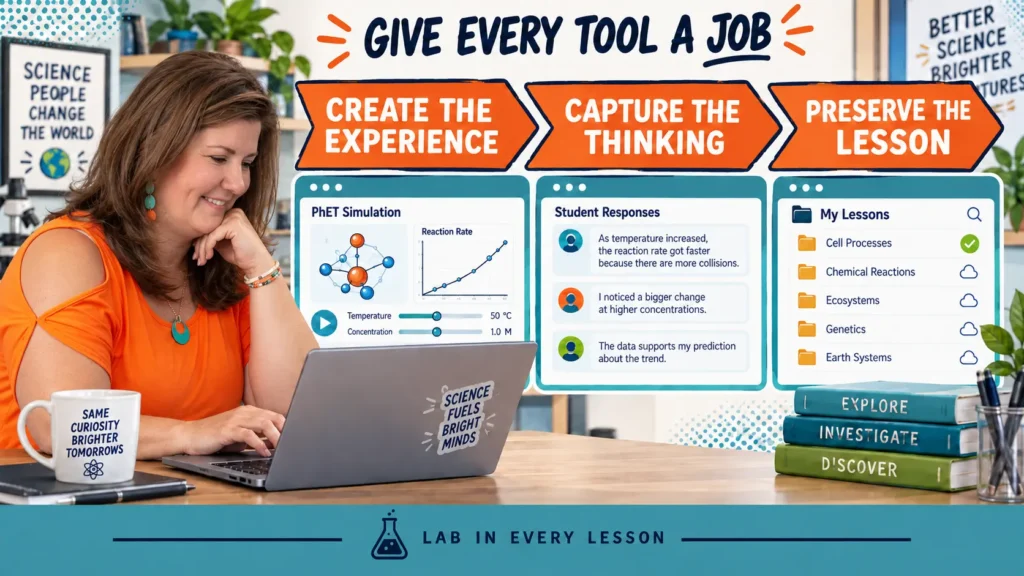
Table of Contents
- Why Technology Tools for Teachers Need Clearly Defined Jobs
- Build Classroom Technology Integration Around Three Stages
- Before Instruction: Find a Resource Students Can Investigate
- During Instruction: Use Seesaw to Make Student Thinking Visible
- Beyond the Live Lesson: Use BookWidgets to Preserve the Experience
- Use Technology Without Turning Science Into More Screen Time
- Start With One Lesson and Build a Repeatable Routine
Why Technology Tools for Teachers Need Clearly Defined Jobs
Most conversations about educational technology begin with the wrong question: “Which tools should I use?”
A more useful question is, “What does this lesson need students to do?”
- Do students need to manipulate a model?
- Compare conditions?
- Observe a process that happens too quickly, slowly, or invisibly to examine in the classroom?
- Record evidence?
- Revise an explanation?
- Complete the experience after an absence?
Once the learning need is clear, choosing the tool becomes easier. You aren’t asking one platform to do everything, and you aren’t collecting apps because someone called them engaging. You’re assigning each technology a specific instructional job.
“The goal isn’t to use more technology. It’s to give each tool a job that makes student thinking easier to create, see, support, or revisit.”
This also changes what consistency means. Consistency doesn’t require students to complete the same type of activity every day.
It means the structure – the daily routine and classroom expectations – feels familiar and are continually reinforced even when the scientific evidence changes. Students learn that they will investigate something, make their thinking visible, and use evidence to build meaning.
That familiar rhythm leaves more attention available for the science skills to be practiced and improved.
Build Classroom Technology Integration Around Three Stages
I think about classroom technology integration in relation to the purpose of a lesson.
| STAGE | INSTRUCTIONAL NEED | TECHNOLOGY TOOL JOB | EXAMPLE |
| Before instruction | Give students evidence to examine | Create the experience | Simulation, interactive tutorial, video, or article |
| During instruction | Reveal what students notice and understand | Capture the thinking | Seesaw artifact, screenshot, annotation, explanation, or model |
| Beyond the live lesson | Keep the experience available and coherent | Preserve the lesson | BookWidgets lesson for absences, extra time, stations, or asynchronous work |
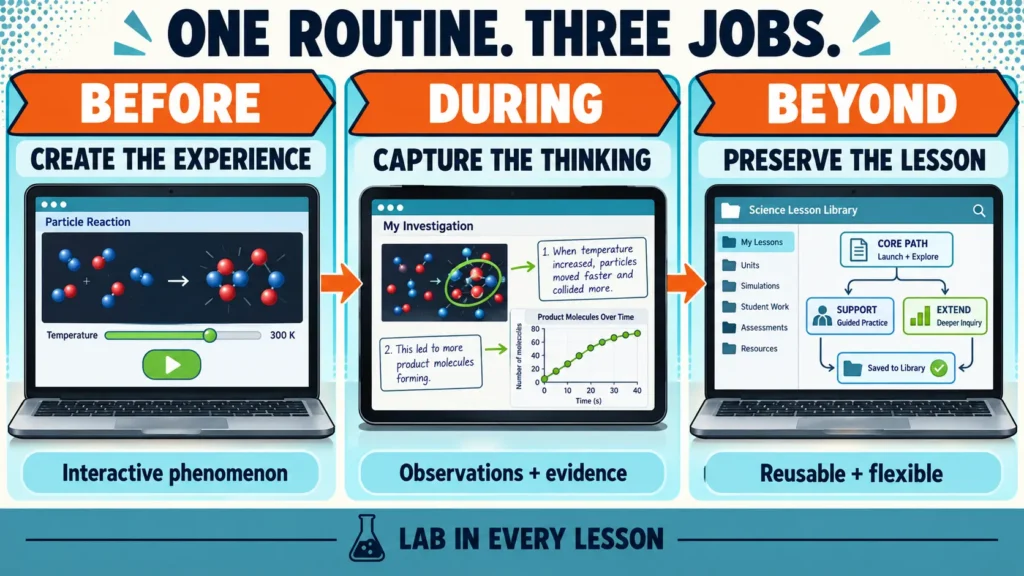
The three stages can overlap. Students may work through a simulation inside a live lesson, document their observations in Seesaw, and later finish the same investigation through a BookWidgets sequence. The point isn’t to create rigid boundaries. It’s to prevent every tool from competing to become the center of the lesson.
Before Instruction: Find a Resource Students Can Investigate
The first “tool” in this system isn’t a single platform. It’s your ability to find a digital resource that lets students encounter the scientific relationship for themselves.
That resource might be a student-controlled simulation, an interactive tutorial, a model, a short video, a sequence of images, or a carefully chosen article. The format matters less than the thinking it makes possible.
A simulation is especially useful when students need access to something they cannot reasonably observe at a lab station. For example:
- the behavior of particles at the atomic or molecular level
- the inside of a cell, organ system, or planet system
- a life cycle or environmental change that unfolds over weeks or years
- radioactive decay across time scales no class period can reproduce
- a system whose variables students need to manipulate repeatedly
This is one way technology in the science classroom is more than providing a digitized worksheet. It can give students access to evidence that would otherwise remain available only through teacher explanation (which is something we want to avoid at all costs when teaching with active, inquiry-based techniques).
Search for the Scientific Relationship
Broad searches such as “biology simulations” or “chemistry websites” can help you discover large resource collections. But they often create more browsing than planning.
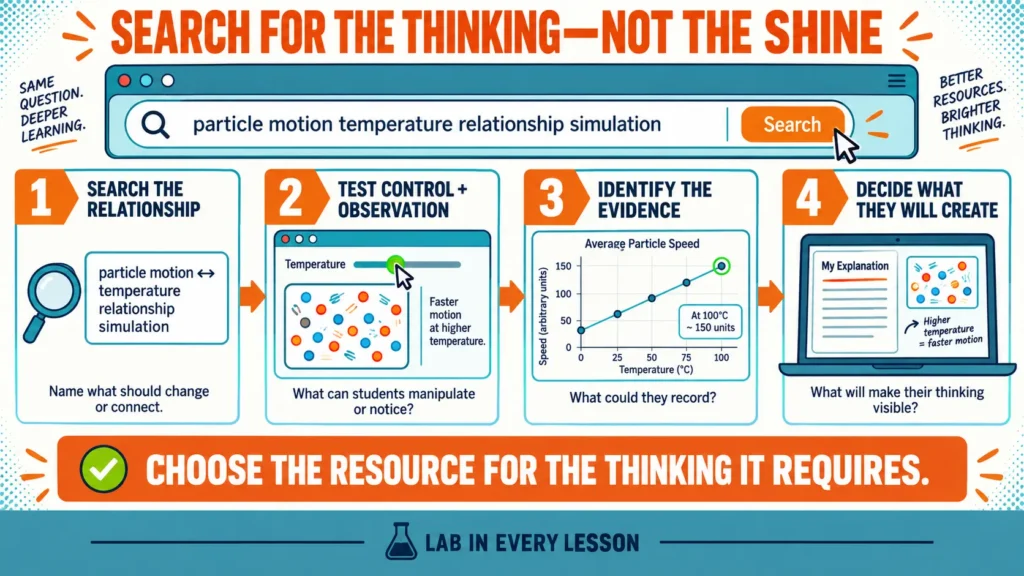
When I’m building an actual lesson, I search for the smallest scientific relationship I need students to examine. “Food chain simulation” will usually take me closer to a usable experience than “ecology resources.” “Molecular polarity interactive” is more useful than “chemistry activities.”
Try pairing the specific concept with the following terms such as:
- simulation
- interactive model
- virtual lab
- interactive tutorial
- data visualization
- animation
Large libraries still have value. LabXchange, PBS LearningMedia, Concord Consortium, PhET, and discipline-specific collections can become discovery pools. But meaningful technology integration doesn’t require your school to purchase an expensive platform or hand you a complete technology-based curriculum. In fact, no single subscription or resource library is likely to provide the exact experience every lesson requires.
“You don’t need an expensive platform or an entire digital curriculum. You need the right evidence for the lesson in front of you.”
You can build a far more purposeful routine by beginning with the specific scientific relationship students need to investigate, then selecting the free simulation, model, visualization, video, or text that makes that relationship visible. You don’t need an entire digital curriculum. You need the right evidence for the lesson in front of you.
Evaluate the Thinking the Resource Requires
A polished resource isn’t automatically a productive one. Before you place it in front of students, work through it as a student would.
Ask:
- What can students control, change, compare, or replay?
- What will they be able to observe that was not visible before?
- Does the resource expose a relationship or simply tell students the answer?
- What evidence could students collect from it?
- What could they create to show what they understand?
- Which parts are essential, and which can I ignore?
Don’t dismiss a resource simply because it is described as a game. The label tells you very little about the intellectual work. Some playful tools require careful systems thinking; some serious-looking tutorials require little more than clicking “next”!
“Technology doesn’t make a lesson active. The work students do with it does.”
If no simulation exists, the experience can still be inquiry-based. Students might compare a set of images, synthesize evidence from two short videos, annotate a diagram, or use an article to trace a process. The goal is not to force every lesson into the same digital format. The goal is to find evidence students can do something with.
During Instruction: Use Seesaw to Make Student Thinking Visible
A strong digital experience can still disappear the moment students close the tab. They may have manipulated variables, noticed a pattern, or corrected a misconception, and you need a way to see that thinking! Our students need something they can return to later.
That is the job I give Seesaw.
Seesaw is an edtech tool marketed exclusively for use with elementary classrooms, but its basic function is useful at any grade level: it gives each student a place to create and keep a visible record of learning. In my high school science lessons, the Seesaw platform isn’t the investigation. It’s the surface, the digital paper, upon which students show how they make sense of the investigation.
Build a Digital Artifact Around the Science Students Are Doing
The artifact can be simple. Students might:
- add screenshots from a simulation and label the evidence they noticed
- draw models or annotate them
- drag and sort models into categories, then explain the rule they used
- record a brief oral explanation of a pattern
- compare before-and-after images
- revise a model after receiving new evidence
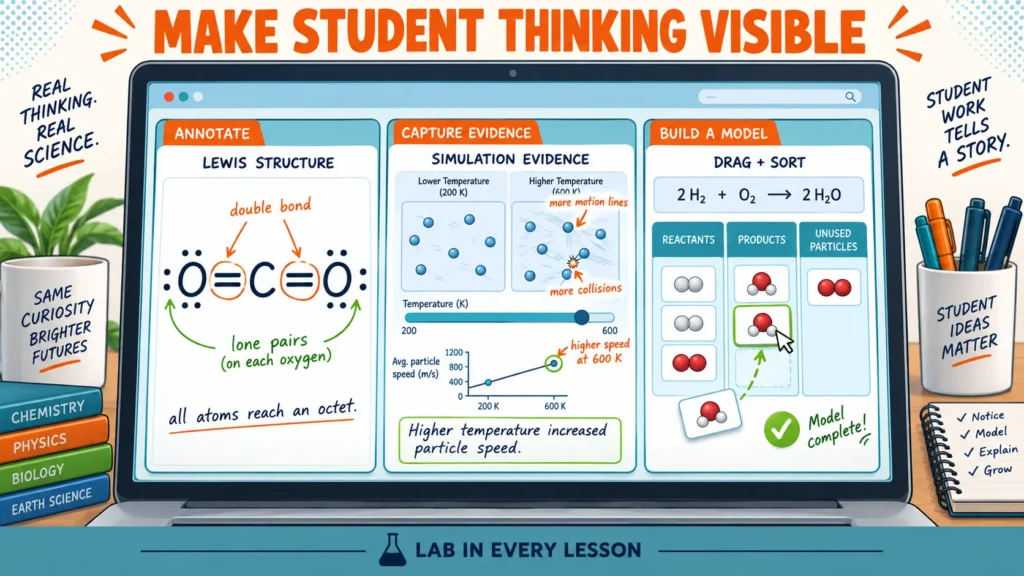
I build activities around the student action I want to observe. A few examples to illustrate my point:
- If students need to identify evidence, I create a place for them to capture and label it.
- If they need to connect structure and function, I provide images they can annotate.
- If they need to construct a model, I provide movable pieces or a blank space in which to build it.
The directions and links may live inside the activity, but the science remains the point, the purpose. It’s intentional instructional design!
Seesaw simply keeps the thinking from becoming invisible or forgotten.
Review Progress Without Scoring Every Response
Making thinking visible does not mean turning every artifact into a grade that reflects mastery.
The real value is that you can look across student work while learning is still happening. You can see who has started, who is collecting evidence, who has built a reasonable model, and who may be clicking through without making sense of the experience.
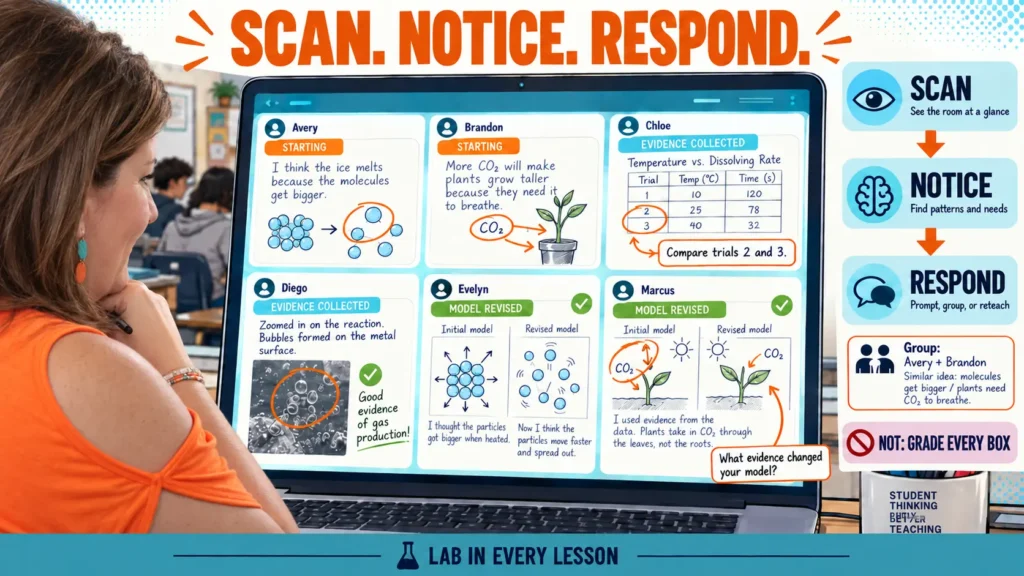
That information changes what you will do next. You can pull a small group, ask one student to clarify a claim, point another back to a specific observation, or invite the class to compare two different approaches.
Students also build a record of growth. Their work no longer lives only in a notebook page they may misplace or in a conversation that ends when the bell rings. A digital portfolio gives them something to revisit, explain, revise, and share.
And, Seesaw provides us with several options for feedback so that we can choose what fits the moment.
- A quick acknowledgment may be enough when a student is on the right path.
- A written or recorded comment can help when the thinking needs another step.
- A private message that connects to the family to course-correct or celebrate is even possible.
The advantage is the opportunity to keep all stakeholders engaged and communicating without creating a new pile of work for you to thoughtfully assess and score against a rubric.
Beyond the Live Lesson: Use BookWidgets to Preserve the Experience
Seesaw captures what students do during the active, student-centered portion of an inquiry-based science lesson. BookWidgets solves a different problem: How do I keep the complete learning sequence available when a student (or I) cannot participate in the lesson as originally planned?
Absences are the obvious example, but they aren’t the only one. Some others include, but are not limited to:
- A student may need extra time.
- A class may rotate through stations.
- A teacher may need a meaningful plan for a substitute.
- Part of the course may be asynchronous.
- Some students may be ready to move ahead while others need to revisit the evidence.
In moments like these, a list of disconnected links is not enough. Students need to work within the framework of the entire lesson.
Rebuild the Learning Sequence—Not Just the Assignment
A complete digital lesson can include:
- the purpose or learning goals
- a prompt that activates relevant prior knowledge
- links or embedded media students need to investigate
- an artifact that includes:
- images, tables, or diagrams that organize evidence
- questions that move from observation to interpretation
- a place to construct and submit notes and conclusion
- feedback that helps students correct course
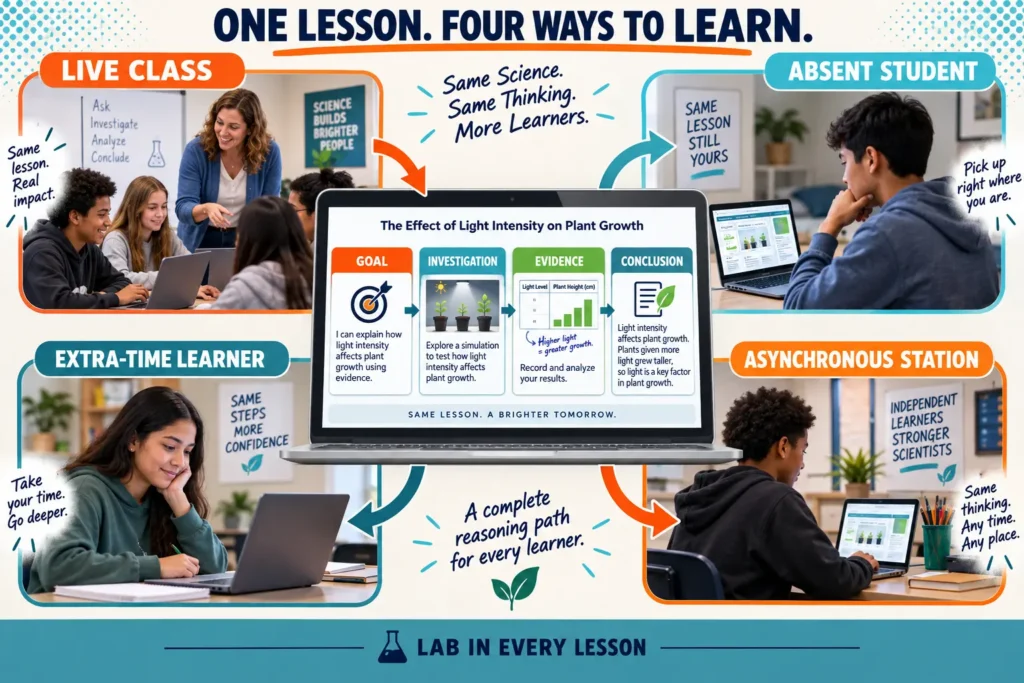
That sequence matters because a worksheet – even an activity – does not constitute a lesson. In a live classroom, teacher questions, timing, transitions, examples, and responses help students connect one step to the next. So, it stands to reason that if students are working independently, the digital structure has to carry more of that coherence.
BookWidgets gives me a way to package that entire structure. It can present and collect several kinds of content and responses in one activity, which makes it useful for building a lesson students can complete beyond the original class period. If your school utilizes a learning management system, it can even connect directly with several of the most popular LMS options on the market.
…. a worksheet – even an activity – does not constitute a lesson.
Use Immediate Feedback Without Removing Productive Struggle
Automated feedback is useful when it gives students information they can act on. It should not rush them toward the answer before they have had a reason to think.
Use immediate feedback for checks that help students orient themselves:
- identifying a component correctly
- reading a value from a graph
- matching a representation
- confirming that a calculation is on track
Save more complex explanations, models, and arguments for teacher or peer response when the quality of the reasoning matters more than a single correct entry.
The same principle applies to answer keys. Access to a correct response can support revision, but only after students have produced thinking worth revising.
Use Technology Without Turning Science Into More Screen Time
Any honest conversation about technology tools in education has to acknowledge the concern we all have (even me!): students already spend a great deal of time on screens.
The answer is not to pretend every digital experience is automatically worthwhile. It’s to distinguish passive screen time from purposeful action and to keep choosing the format that best serves the learning:
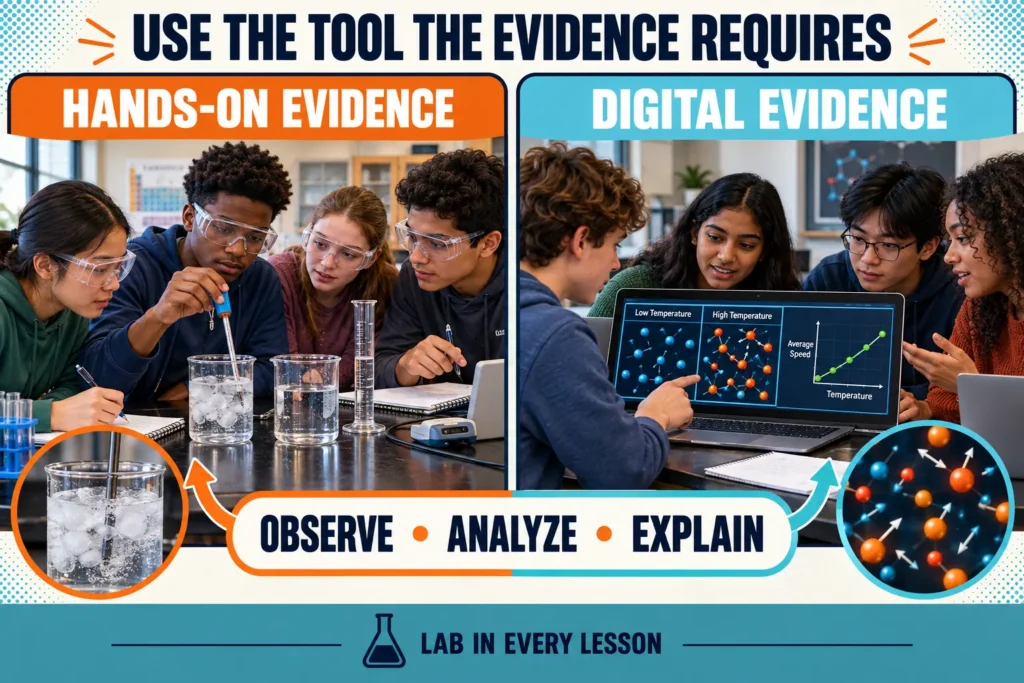
- In our secondary science instruction, we can’t avoid using physical lab materials when students need to measure, manipulate equipment, develop technique, or experience the uncertainty of real data.
- We’ll rely on collaboration and evidence-driven discussions when we want students to challenge explanations or build meaning through uncertainty.
- We can use paper when sketching, sorting, or thinking by hand is more efficient.
- And, we turn to technology when it gives students access, visibility, feedback, or flexibility the other formats cannot provide as well.
Balanced technology integration can support student learning by allowing them to:
- explore places, systems, and scales they cannot physically enter
- compress or expand time so a process becomes observable
- repeat a trial without exhausting limited materials
- adjust variables and compare outcomes
- access a lesson from another place or at another pace
- document and revisit their own thinking
Technology can also fail! Sometimes at the worst possible moment!
- Wi-Fi drops.
- Devices lag.
- Students wander to unrelated tabs.
- A resource disappears.
And that’s exactly why the routine we establish in the type of work we want our students to encounter everyday matters more than any one website or commercial platform. When students understand the intellectual job that the science and engineering practices and crosscutting concepts demand, we can shift gears and replace the technology tool on the fly without abandoning the lesson’s focused purpose.
Start With One Lesson and Build a Repeatable Routine
You do not need to rebuild or redesign your course to become inquiry-based and student-centered for this system becomes useful!
Choose one lesson you already teach and ask three questions:
- What could students investigate before I explain the idea?
- What could they create so I can see the thinking the investigation produces?
- How could I preserve the sequence for a student who needs to complete it beyond the live class period?
Then assign one tool to each job.
And, know that the first version won’t be perfect! Remember … growth mindset?!
You might discover that the simulation gives students too many variables, the Seesaw artifact you created asks for more clicking than thinking, or the independent version needs clearer connections between phases of learning. None of those are reasons to abandon the routine. Consider it information you can use to improve the next version.
In short order, students become familiar with the structure you adopt as long as you remain consistent. They’ll begin spending less time and energy figuring out where to click and more figuring out what the observations they’re making means. You’ll progressively begin to paint a more detailed picture of what each student can do, not only what they were able to remember. And the lesson will remain available when time, attendance / availability, or location changes.
That’s the larger promise of these technology tools for teachers. They don’t simplify science by making it easier or thinner. They simplify the routine surrounding the thinking, so you can make more room for the work that matters!
Get the EdTech Essentials That Support This Routine
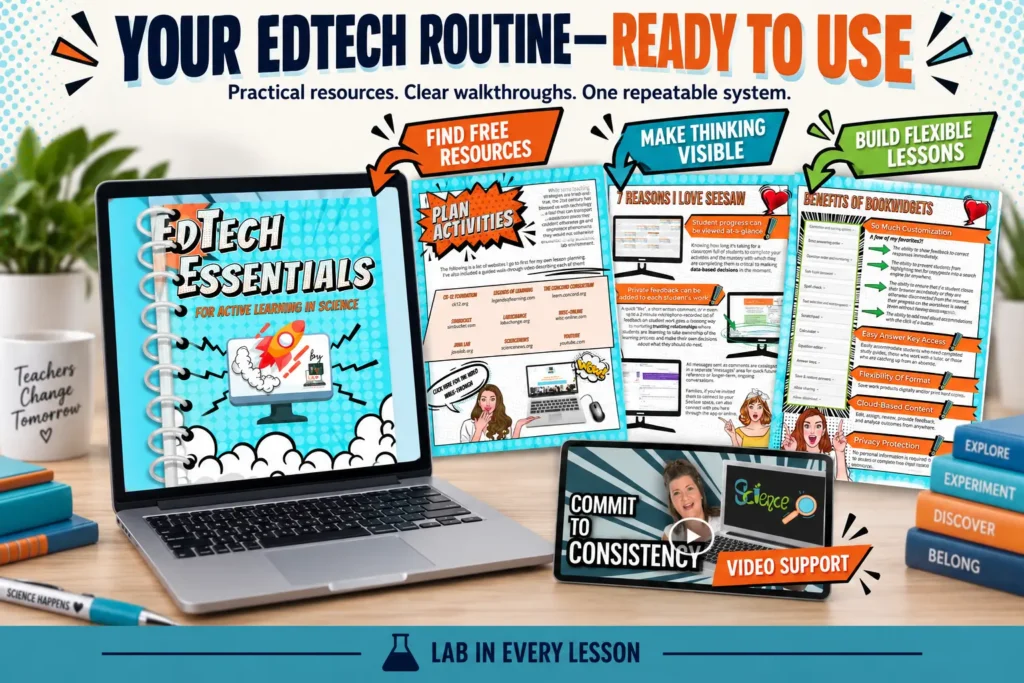
If you’re ready to try a routine like I’ve describe in this article but don’t want to begin with another open-ended search, my EdTech Essentials guidebook will give you a strong starting point.
Inside, you’ll find:
- nine sites I use to find free digital science resources
- a 60-minute walkthrough that shows how I evaluate and use them
- steps to setting up your first Seesaw activity and seven reasons it works in secondary science classrooms
- steps to building for your first BookWidgets worksheet
I don’t receive any compensation from these companies for recommending them on my blog, either. They are truly part of my success strategy for teaching secondary science in a cyber environment, but they are tools I’d take with me to a traditional classroom. And I package them up with all the inquiry-based chemistry and biology lessons I sell in my Teachers Pay Teachers store.